Author Archives: philippe.morlhon@mouvement-up.fr

PRACTICAL ONLINE ACTIVITIES

INTRODUCTION


This sheet provides you with guidance on how to lead practical online activities related to media literacy. The activities are in English.

You can lead these activities via videoconference, first presenting the exercises, then carrying them out, then having a discussion and debate as a class.


You can also send the students links to activities as well as ‘homework’ for them to do on their computers.


ONLINE QUIZ – IDENTIFYING FAKE NEWS


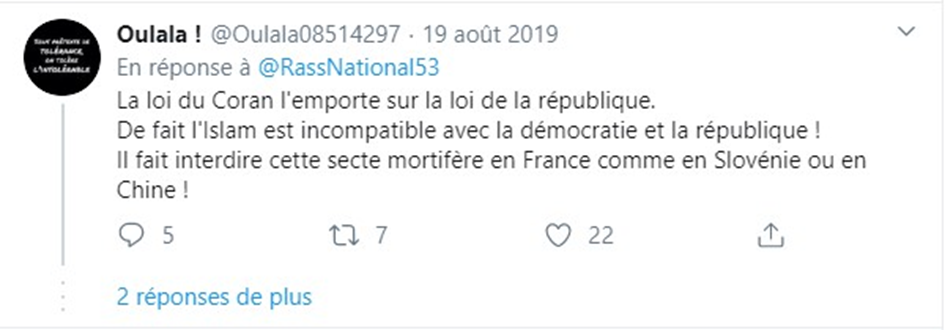
The online quizzes below help familiarise learners with the method of fact checking. They are asked to assess whether the articles or images present verified news or fake news. The UNICEF activity is specifically dedicated to fighting the distortion of information around the coronavirus.


Online quiz from ABC EDUCATION

‘Real, LOLZ, oops or fake’ – link

Online quiz from QUIZIZZ
‘Media literacy and fake news’ – link

Online quiz from FACTITIOUS
‘True or false: Check your fact-checking skills through 6 levels’ – link


Online quiz from UNICEF:
‘Fact or fiction: How much do you know about the coronavirus disease’ – link


DEBATES ON PODCASTS OF ‘ON THE


ON THE MEDIA has created a podcast series that discusses issues related to media, information, and fake news. We have selected three episodes that could be useful as part of a lesson. You can tell your students to listen to the podcasts and then bring up the debates online around specific conspiracy theories, online hate speech, or disinformation campaigns.


Podcast 1:
‘The Covid Conspiracy Boom on Facebook’ – link

Podcast 2:
‘Conspiracy and xenophobia in the Polish media landscape’ – link

Podcast 3:
‘Coronavirus disinformation campaigns’ – link


ESCAPE GAMES – IMMERSIVE, MIL-RELATED ONLINE GAMES


To make media literacy education more tangible, you can let your students produce their own information or fake news using immersive online games.


Become a junior reporter for the BBC

‘iReporter Game for students’ – link

Your role as a BBC reporter is to provide up-to-the-minute news coverage by posting your story to BBC Live. Your story will be judged on how it balances accuracy, impact, and speed.


Become a fake news producer with FAKE IT TO MAKE IT

Immersive online game – link

Fake it to make it is a fake news simulator that shows why and how people can be manipulated. In the game, you play a student who makes ends meet the easy way using a fake news site, which makes profits from ads and shares to other (fake) social media groups.


ONLINE ACTIVITIES ON THE TALMIL PLATFORM


The youth section of the TALMIL platform offers practical online activities to help students have fun while they learn about the main concepts of media literacy.

Online quiz:

Test your media and news knowledge! – link

Online quiz:

Real news or fake news? Can you identify the real news items? – link

Practical online activity:

I’m going to be a junior reporter – link

ACTIVITY 2 – MOVING DEBATE

ACTIVITY INTRODUCTION


In a moving debate, students move about the room in response to questions asked by the teacher. The activity is useful because it encourages students to participate and be dynamic.


The aim of the activity is to push students to think about their digital habits and rights on the internet.


Note: A question does not necessarily have to be polarising or controversial to participants. For many questions, participants’ minds will not yet be made up.


ACTIVITY INSTRUCTIONS


1. Set up the room: Students will work as one group.


2. Using a visual aid, such as a PowerPoint slide projected on a screen or white wall, the teacher displays a controversial social media post (for example, a post with an insulting comment from a user) and asks students to move about the room by saying ‘If you think you are allowed to say this, stand on this side. If you do not, stand on that side.’ No one can stay in the middle.


3. Students go and stand on their side


4. Once the participants have positioned themselves, they must justify and explain their position, either by volunteering or by using other methods of choosing who can speak (for example, by passing around a ball). Once one side has given their argument, the other side gives their argument. If a participant thinks the other side’s argument is valid, he or she can change sides.


5. After the debate and the explanations, another question is asked and students change positions again, and so on until the end of the activity.


APPENDIX: Example of a controversial post


Oulala ! @Oulala08514297 – 19 August 2019

The law of the Quran is taking over the law of the Republic

Therefore Islam is actually incompatible with democracy and the Republic!

We need to ban this death cult in France like they did in Slovenia and China!

ACTIVITY 1 – The table of good online habits

ACTIVITY INTRODUCTION


Objectives:


Ask yourself questions about which practices you should adopt online.


Encourage positive, respectful digital citizenship.


Know how to talk about and argue your opinion.


This activity consists of participants filling in a table and a list of a number of possible behaviours on the internet. Participants must choose which practices/behaviours they think are good and bad.


In addition, dialogue and argumentation are vital to this activity; students are required to justify their choice. This objective is achieved even more effectively by appointing a spokesperson for each group, which forces students to seek coordination and consensus before submitting a final answer.


Activity variation: If you do not have a computer or whiteboard, you can print out multiple copies of the best practices table and leave a number of blank squares for participants to fill in as suggestions are made.


ACTIVITY INSTRUCTIONS


1. Set up the room: Divide students into two or three groups and present the best practices table on the board, on the projector, or on paper.


2. Give some examples of suggestions that participants should categorise:

Reporting a hateful or violent comment on a post.

Accepting any and all friend requests.

Blocking someone on a social network.

Debating someone who spews insults in the comment section of a video.

Giving away your address or personal information.

Posting photos of your friends without asking.

Using the same password for all social media.


3. Each response should be logically argued by the groups, with a short debate being held based on the following elements: freedom of expression, moderating hateful content, conspiracy theories, or defamation (see SHEET 14 – DIGITAL CITIZENSHIP and SHEET 12 – AWARENESS AGAINST HATE SPEECH).


DOING THIS ACTIVITY ONLINE


To have participants fill in the table remotely, send it to them and give them some examples of suggestions to use to insert into the table.

APPENDIX

Sample table of digital habits:


Good digital habits

Bad digital habits


ACTIVITY 2 – Leading a social media campaign

ACTIVITY INTRODUCTION


Objectives:

  • Become familiar with the tools of information and communication
  • Use social media for social campaigns
  • Develop critical thinking skills


The aim of this exercise is for participants to create an online social campaign. After choosing which topics they want to address, for example, local issues that affect their neighbourhood, as well as a social network to use in order to share their social campaign’s content, students promote a cause by choosing suitable images and slogans. They then share the media content on that social network.


Definition:


An online social campaign can be defined using the tools of social media communication and marketing in order to take on a social issue (the environment, feminism, racism, poverty, etc.). The goal is to promote certain values and mobilise or raise awareness among individuals, especially internet users, on important social issues, or even to create a movement the likes of #MeToo, Black Lives Matter, or the Serbian #1of5million movement.


ACTIVITY INSTRUCTIONS


1. Prepare: Together with students, teachers select the topics their social media campaigns will tackle.


2. Assign tasks: Once topics are chosen, teachers form several groups depending on the number of participants. Each group works on one topic and chooses the best social network to host their campaign.


3. Research: To make an effective social media campaign, participants must gather information on the topics they have chosen so that they understand the context and can make/spread a message that helps support the cause.


4. Find a communication strategy: Participants should think about the best strategy to get their message across:

  • Identify the target audience (teens, adults, men, women, etc.).
  • Choose the right social network, for example, Instagram for images and Twitter or Facebook for videos and text.
  • Type of message (personal account, humour, figures, mini news report, etc.).
  • Format of the message (photographs, text, infographics, video, etc.).
  • Using the right keywords or hashtags to share the post widely.


5. Launch the campaign: Participants can choose to start their campaign by posting their content to their personal accounts or to create a specific account for the campaign.

ACTIVITY 1 – Discovering citizen media

ACTIVITY INTRODUCTION


In this activity, students discover the topic of citizen media. They will learn to understand for themselves – while remaining under teacher supervision – the similarities and differences between traditional and citizen media. To do this, they will work in groups to compare different types of media.


Each group reads and analyses a type of media provided by the teacher (a daily newspaper, a URL to news programme, a website, a blog, etc.). One group should be assigned a traditional media outlet to analyse, such as a daily newspaper, and the other a citizen media outlet, such as a blog.


Students can do quick web searches on computers and/or on their smartphones.


The aim of the activity is to ensure that the two groups work together to come up with their own definition of citizen media.


Afterwards, teachers can delve deeper into the subject of citizen media and their impact on the world of information.


ACTIVITY INSTRUCTIONS


  1. Set up the room: Divide the students into groups and seat them at computers.
  2. Students analyse the suggested media outlet (print newspaper, episode of a news programme, news website, blog, etc.).
  3. Students answer questions.

    Example: ‘Describe the media outlet: Do the articles have bylines? Whose name? What type of news does it provide? How is it covered? What type of news is prioritised? Does it have ads? What kinds? How is the information presented (analyse headlines, text, images, etc.)?’

  4. Class discussion of what students have found and creation of a common definition based on students’ suggestions. Answers to the questions will lead the teacher to talking about ‘citizen media’.


Note – Definition: Citizen media is media – meaning outlets such as radio, TV, and the internet sources – that are used to provide information to a large audience. The adjective used to modify it – ‘citizen’ – means that the people creating the articles and investigations are not journalists, but rather average citizens who are looking to lead debates on specific issues or problems that affect all of society.


DOING THIS ACTIVITY ONLINE


  1. The teacher sends students a Zoom link (or any other platform).
  2. Once students are in the meeting, the teacher puts them into ‘virtual breakout groups’ and assigns them the media outlet to analyse by sending them a link.
  3. Students can discuss the outlet using the separate ‘rooms’ offered by videoconferencing platforms such as Zoom.
  4. The teacher sends the link to the list of questions (created online, for example via the website https://www.dragnsurvey.com/en). Students respond in groups.
  5. Class discussion happens remotely on a videoconferencing platform. The teacher can use an ‘online Post-Its’ website, such as https://note.ly as a whiteboard and then lead the discussion.

ACTIVITY 2 – Analysing a conspiracist video

INTRODUCTION


The aim of this activity is to identify as a group the ‘tools’ conspiracists use (unveiling a ‘mystery’, rhetoric, analysing details) as well as to point out the audio-visual techniques used in conspiracist videos (frightening music, robotic voices, deceptive editing, analysis of symbols, etc.).


To make the activity run more smoothly, it is preferable to find a video in advance that has clearly identifiable conspiracist arguments and elements.


Here are some of the elements to be identified in the video:


1. Anxiety-inducing ambiance: Often, you hear a robotic or mysterious voice accompanied by frightening music (such as in a horror film).


2. Special effects: As with the sound, visual effects such as drawings, edited photos, or ‘face morphing’ can sum up the theory and make it simple and memorable.


3. The video is well-structured and well-edited: The structure usually follows a certain logic, such as by starting with a historical element to lend the video a scientific air. Photomontages (series of images) are also a major factor.


4. Quotes pulled from articles or statements: This takes the quotes out of the context of an article, news report, or a person’s statement (such as a politician or scientist) in order to provide evidence for the theory.


5. Truthful but surprising elements: This is not a matter of taking a fact or statement out of context, but rather of using a true fact or real image, such as images or videos of cats behaving strangely.


6. Uncertain or completely false elements: Some of the pseudo-evidence for the presented theory include elements that are wholly made up, extremely uncertain, or unproven. These are slipped into the explanations to overwhelm and confuse viewers.


ACTIVITY INSTRUCTIONS


1. Before starting the exercise, find a conspiracist video about a current topic or specific issue such as terrorist attacks, new world order, or epidemics.


2. Set up the room: Seat students in front of the projection surface and show the video using a projector. You should instruct them to write down the elements used in the video to persuade viewers and identify the main message, thus identifying the tools – i.e. the form – and the meaning – i.e. the function.


3. Note taking: Participants are asked to take notes throughout the video to be able to report on their comments and impressions.


4. Class discussion: Ask participants about the elements they identified and tell them about elements they may not have seen. This is also a chance to expand the discussion to things participants frequently see on the internet: Have they already seen videos like this before? On which topics? Did those videos convince them? Does the video target a particular group as the enemy, such as politicians or banks?


DOING THIS ACTIVITY ONLINE


  1. This activity can also be done remotely. Before class, teachers email the conspiracist video as a file or link.
  2. Teachers send the link to the videoconference on Zoom (or any other platform).
  3. Students work remotely using Google Drive, Framapad, etc. to note down the most important elements.
  4. The class discussion takes place on the videoconferencing platform. The teacher can use an ‘online Post-It’ website, such as http://note.ly, as a whiteboard and take down students’ observations. The teacher then leads the discussion.

ACTIVITY 1 – Cordless telephone

ACTIVITY INTRODUCTION

‘Cordless telephone’ is an activity in which participants play together and witness together the disinformation that a speech or event can undergo when it is shared and spread on social media as well as in everyday life. The activity teaches the issue of how statements that circulate online can be twisted and explains the consequences this distortion can cause, especially if the statements directly target people or groups of people.


To begin, a person makes up a story, then whispers it into the ear of the person next to them, who does the same, continuing until every participant has heard the story and told their version of it.


In the post-activity discussion, teachers can bring up the issue of interpretation and subjective biases in spreading information.


Activity variation:

  • You can show a picture or short video to the first participant, who then tells their neighbour what they have seen without showing the neighbour the same image. The information is passed orally to the next participant, and so on. At the end of the activity, the teacher shows the original image to the group and observes how it was distorted.


ACTIVITY INSTRUCTIONS


1. Prepare the activity: Teachers must first prepare one or more stories for the game or find images showing an action or event to maximise the number of elements to take into account. You can adjust the difficulty of the activity by adjusting the complexity of the image or story.


2. Set up the room: Teachers give the instructions and tell their version of the story or show the image to the first person.


3. Procedure: First, students sit in a large circle. The first person whispers their story (or their description of the image) into the ear of the person sitting to their right. This person then whispers their version into the ear of the person sitting next to them, and so on until everyone has heard the story. The last person repeats the version that they heard aloud. The group then compares this version with what was told to the person who first told the story and note the differences.


4. Class discussion: To discuss, use the following questions (written on the board): How did the story change when it was told multiple times? What affects the way someone hears and interprets information? What impact do our experiences and interests have on our points of view? Do people sometimes hear multiple interpretations of the same story and start to wonder which version is more accurate? If everyone sees and hears everything slightly differently, how do we know if the story is accurate? How do the changes to the story make you feel? Compare how the first person to tell the story feels compared to the rest of the group. What happens when the story is a personal one and the meaning of the story changes? Would you be willing to share what happened in this activity on the internet?

ACTIVITY 3 – Perceptions of ‘national heroes’

ACTIVITY INTRODUCTION


Objectives:


  • Discover the diversity of perspectives of shared historical events as well as the varying views of the major political figures associated with them.
  • Think more critically about one’s own national history.

This activity can be followed up with a discussion on national myths and the figures they pertain to.


ACTIVITY INSTRUCTIONS


1. Set up the room: Divide students into groups according to the number of participants.


2. Once groups are formed, each group chooses the national historical or political figures they consider ‘heroic’ or important and explains why they admire and are proud of these figures. This first part should take between 10 and 20 minutes. Participants can choose an unlimited number of figures.


3. If necessary, and if the room is equipped for it, participants can use computers or their smartphones to collect information or place the figures they have chosen into the correct historical context.


4. Once they have chosen their ‘heroes’, the groups present their lists to each other and the teacher writes the names on the board, underlining those who are mentioned most often.


5. The next part of the activity involves asking the participants questions, such as:

• Was anyone surprised by the heroes listed? Why?

• Does anyone know all of the heroes listed?

• Why are national heroes the ones most people know? What human values do they represent?

• What makes us admire some heroes more than others? Where did we learn to respect them and why? Do you think that if they were still alive today their actions and values would still make them heroes?

• Do you think the heroes listed are universal? Do you think everyone considers them heroes?

These questions should open a discussion among participants.


DOING THIS ACTIVITY ONLINE


  1. The teacher creates a link to a Zoom (or other videoconferencing platform) meeting and sends it to students.
  2. Once they are in the ‘virtual meeting room’, the teacher puts students into groups (depending on the number of participants).
  3. Each group chooses the national historical or political figures they consider ‘heroic’ or important and explains why they admire and are proud of these figures. This first part should take between 10 and 20 minutes. Participants can choose an unlimited number of figures.
  4. Once the groups have chosen their ‘heroes’, they present their lists to one another and the teacher writes down the names on a virtual whiteboard, such as https://awwapp.com/#, underlining the names that are mentioned most often.
  5. The groups leave the main meeting room and enter ‘breakout rooms’ on Zoom.
  6. The next part of the activity involves asking the participants questions, such as:

•Was anyone surprised by the heroes listed? Why?

• Does anyone know all of the heroes listed?

• Why are national heroes the ones most people know? What human values do they represent?

• What makes us admire some heroes more than others? Where did we learn to respect them and why? Do you think that if they were still alive today their actions and values would still make them heroes?

• Do you think the heroes listed are universal? Do you think everyone considers them heroes?

These questions can be sent via Framapad link to the two groups in the Zoom breakout rooms.

  1. This is when participants should start researching online to collect information or place the figures they have chosen into the correct historical context.
  2. Once the groups have finished their research and answered the questions, they return to the main meeting room to start the class discussion. The teacher can use an ‘online Post-It’ website such as https://note.ly as a whiteboard and show it to all participants in real time via screensharing.

ACTIVITY 2 – EVERY PHOTO TELLS A STORY

ACTIVITY INTRODUCTION


Objective: Show students that our perceptions are distorted and influenced by factors such as past experiences, expectations, and culture and that the images we have of others effect our interpretation of their behaviour.


This activity has multiple parts. First, the teacher gives students photos that have been cut in half. Then, students are asked to ‘complete’ the photos with the information they can deduce from them. Their perceptions and views of others will affect how they reconstruct the photos.


After showing the complete photo to students, they will work with the teacher to identify recurring themes in their stories. After writing these down on the whiteboard, the teacher starts a discussion about stereotypes and preconceived notions as well as the role of myths in our interactions with others.


ACTIVITY INSTRUCTIONS


1. Teachers give each student a photo that has been cut in half.


2. Students ‘complete’ the story told in the first half of the photo. They have 5 minutes to write the story.


3. Students share what they have written with each other. If the group is large, teachers can create smaller groups of six to eight.


4. The teacher reveals the second half of the photo and asks students to reconsider their impressions.


DOING THIS ACTIVITY ONLINE


  1. The teacher prepares the exercise in advance and chooses the photo. The photo to be cut up should reveal a more complex reality as a whole than the incomplete version.
  2. The teacher emails the photo to students along with a set of instructions and a link to the meeting room in Zoom or any other platform for the videoconference.
  3. In the videoconference, the teacher divides the students into groups.
  4. Each group uses a word processor such as Google Drive or Framapad to ‘complete’ the story represented in the first half of the photo. They have 5 minutes to write the story.
  5. Class discussion: The teacher can use an ‘online Post-It’ website such as https://note.ly/ as a virtual whiteboard to write down elements from the various stories. The teacher can then moderate a discussion.


APPENDIX: EXAMPLE OF A PHOTO CUT IN HALF


Students ‘complete’ the photo using the information they can deduce from the image.

Here is the complete picture:

It shows Gisèle Marie Rocha, a Brazilian Muslim woman who plays guitar in a metal band.

ACTIVITY 1 – COLLABORATIVE STORYTELLING

ACTIVITY INTRODUCTION


The aim of this exercise is to deconstruct stereotypes and perceptions of ‘the other’. Students will explore the images they have of people from other cultures and social groups.


To do this, students will work together in groups to create a story about two fictional characters with particular identities (for example, a young Kosovar named Valmir and a young Serb named Dragan).


Comment: Since this exercise deals with stereotypes and perceptions, it may be useful to remind students at the start of the activity that they must be respectful toward others, including toward the fictional characters in the story they create. As such, if an element of the story seems too controversial or disrespectful, you may have to intervene to tone it down.


It is also possible to limit the activity to just one character.


ACTIVITY INSTRUCTIONS


1. Set up the room: Participants form a large circle in the room.


2. Assign roles: One or more students play the role of observers. They stay outside of the circle and take note of the story to be created.


3. The other members of the group work together to make up a story. To do this, they use a ball to pass to one another. The participant who gets the ball must add on to the story.


4. Start the story with a statement such as ‘This is the story of Valmir, a young Kosovar…’ and pass the ball to a member of the group, who then continues the story by adding on elements about the character. Each person adds a few words or up to a few sentences before passing the ball to someone else.


5. The group continues the activity, working together to build a story.


6. After 10 or 12 turns, depending on how much participants have added, ask for the ball back and say ‘Valmir knows Dragan, a young Serb who has a story of his own…’. Then pass the ball to a member of the circle to continue Dragan’s story as part 1 of the activity by adding one or two sentences per person and then passing the ball.


7. The activity ends once both stories are of sufficient length and everyone has had a chance to contribute to both stories.


8. Class discussion and debate: After the activity is over, the teacher asks the group to tell the stories of Valmir and Dragan, recounting their respective lives. The teacher gets students to think about the stereotypes and prejudices contained in the students’ made up stories. The main points are written down on the whiteboard. The teacher can then lead a debate about stereotypes and perceptions of the other.


DOING THIS ACTIVITY ONLINE


  1. The teacher creates a Zoom link and sends it to students.
  2. Students use a word processing platform such as Google Drive or Framapad to write their collaborative story together in the same document. The story starts with a statement such as ‘This is the story of Valmir, a young Kosovar…’. The group continues the exercise, working together to create a story.
  3. After 10 or 12 turns, depending on how much participants have added, the teacher intervenes and adds a new sentence: ‘‘Valmir knows Dragan, a young Serb who has a story of his own…’. The collaborative story starts again with a group member continuing the story of Dragan in the same way as in part 1 of the exercise, with each person adding one or two sentences.
  4. The activity ends once both stories are of sufficient length and everyone has had a chance to contribute to both stories.
  5. Class discussion and debate: After the activity is over, the teacher asks the group to tell the stories of Valmir and Dragan, recounting their respective lives. The teacher gets students to think about the stereotypes and prejudices contained in the students’ made up stories. The main points are written down on a whiteboard. The teacher can then lead a debate about stereotypes and perceptions of the other. The teacher can use an ‘online Post-It’ website as a virtual whiteboard (example: https://note.ly/) and take down participants’ observations.